
How far can you go? Polk Monitor 7B Rebuild
If you’ve paged through my blog posts you may know I like Polk Monitor series speakers. Especially the Monitor 7 series.
In my opinion, the Monitor 7s represent the the best balance of detail, imaging, and accuracy up and down the frequency ranges. They may not have as much rumble as their bigger counterparts in the series (10 and 12), but for what is essentially a 2-way 6.5″ bookshelf speaker that you can find for as little as $20, there is absolutely no equal.

what more could you want or need?
I’ve had three pairs of Monitor 7s now – a pair of Monitor 7cs, Series II, and my Monitor 7Bs. I loved all of them, but my favorite of all is the earliest pair, the 7Bs, with the legendary Peerless tweeter.

My Polk 7B alongside its little brother the 5B
I got turned on to the Polk online forum early on in my Polk hobby (www.polkaudio.com/forums). In addition to some of the most helpful and knowledgeable folks in the audio internet, the Polk Forum is home to a trove of information on mods and restoration tips for Polk speakers, maintained by a dedicated and friendly group of tinkerers. Some of their expertise deals with cheap fixes and quick mods, but just as much of it focuses on taking the impressive Polk speakers to the next level and then some. Some of the mods discussed can cost hundreds or thousands of dollars.
Hundreds for a speaker that can be found for $20-100 in good condition? Why? How can you justify that kind of outlay for mods on what many audiophiles consider a somewhat modest speaker?
Well, because in many cases these mods are blessed by Matthew Polk himself. And I don’t care if the audiophiles turn their noses up at the Polk line. They are amazing speakers, and the SDAs especially deserve their cult status. And trust me until you’ve heard a pair of SDA-1 with Larry’s Rings, Clarity Caps, and the RDO-198s, you haven’t lived.
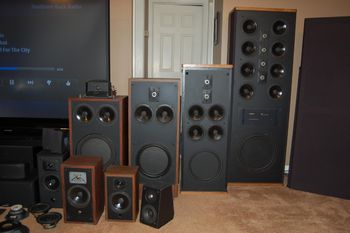
These are not mine, but what a collection! – credit here: http://www.avsforum.com/t/618137/calling-all-polkies-official-polk-thread/18240
And what’s more, Polk, in addition to fostering a close relationship with its clients, is honest with them. The company has noted that the speakers it made in the 70s and 80s were great, but could have been much better had the designers been able to take them where they wanted to outside of the limitations of the pricing constraints of the market. When you realize that materials only comprise up to 20% of the cost of a home audio speaker system, you realize how many design and component compromises must take place even in a $400 system like the original Polk 7s. It’s amazing that the company was able to build such high performing components!
For that reason, Polk has supported the belief that, especially for its older lines of speakers, advances in component technology (particularly in crossover components) and no limits on components budgets mean that owners can, for a limited additional outlay, take their speakers to the higher levels of performance than the designers originally could have due to those final cost limitations. That, paired with the low cost of these speakers on the secondary market now, mean that hobbyists can build speakers that rival new audiophile designs costing much much more.
So how much could an additional hundred dollars get you in sound? Could it get you to the level of a $1,000 monitor system?
I decided to find out.
I pulled my beloved 7Bs apart and decided to see how far they could go. Or, rather, how far I could take them, by doing the main performance modifications recommended on the Polk Forums. These modifications are designed to upgrade the crossover components to a higher standard, eliminate resonance and ringing from within the cabinet and from the baskets of the speaker and passive radiator, and tighten the seal between the speakers and the cabinets.
Since my speakers were also not the prettiest to look at, I also decided to try my hand at re-veneering the cabinets to make them more attractive.
So here’s how it went:
1. The first thing I did was disassemble the speakers completely and bag all the pieces: drivers, tweeters, and passive radiators, as well as the crossover/terminal cup and the batting contained behind the tweeter inside. I marked all the wires on the crossover cup as I disconnected them from the speakers so as not to mix up the mid and tweeter hookups.

Larry’s rings and blanks and assorted parts and tools
2. After pulling everything apart, I started on the cabinets. The old vinyl covering was scratched and kind of icky looking. In my opinion, the biggest drawback of the Monitor series is the generic covering on many of them. Especially on mine, the woodgrain covering is not very convincing. Other coverings (especially the grained rosewood and oak on later models) are much better. I took my clothes iron and, using a cotton cloth as a buffer, began to heat the vinyl to melt the glue. With enough heat, the vinyl pulled right up. It was a long and tedious job, and my fingers ached afterward. Not much fun, but once the vinyl was off I had some clean speaker cabs!

Peeling vinyl woodgrain off of the Polk 7Bs

Iron-off vinyl veneer. Crummy work
3. I taped and re-painted the bare mdf on the back edges of the cabinet to a dark black. I also sanded the mdf cabinet sides a bit and added some putty to dinged corners to even things out.

Bare MDF cabinets ready for rings
4. My next stop was the veneer. This was absolutely uncharted territory for me so I tried to do as much research as possible before buying materials, and especially before cutting wood! After research I decided to go with a Cherry veneer – I like a bit of a redder color, and liked the idea that the wood could age and change with time. Cherry has a neat grain, and is cheap to boot. I did invest in cherry veneer with a peel and stick backing. This basically takes your basic paper-backed veneer and adds a 3M adhesive that’s ready to go. In my opinion it’s a no-brainer – I saved a ton of time by not having to spread glue on surfaces, let it dry, and then re-activate through heat. Definitely recommended.

Polk with fresh cherry veneer applied. Hurray!

Applying Cherry veneer sheets. Tools of the trade behind.
A few other tools I bought that helped a ton were a veneer spreader and a edge bander. The veneer spreader applies even pressure to smoothe out the veneer on the surface, and the edge bander is an easy way to quickly and evenly trim extra material off of the edge of a veneer sheet once’s its affixed to the surface.
I made close measurements of each side and cut them out of the veneer with a razor, leaving about 1/8″ extra on all sides. I then lined up the sheet over the paned with the backing still on to test fit. To help me line up the veneer for application, I used little pencil lines to help line up the sheet.
Once you pull off the adhesive backing, you only have one go at applying the veneer – you cannot pull it back off. So get it right!
Once the veneer was on, I smoothed it down with the spreader and used the edge trimmer to get the excess. Then on to the next side. Once I got the hang of this process, it wasn’t hard. The toughest part was doing the thin front face pieces, which fit together with angled edges. There is probably a technique to cut these and make it easy but I don’t know it. I had to eyeball it. It came out pretty well, but not perfect.
After everything was on, I sanded and smoothed out the finish, and applied a water-based stain. I then used a satin-finish rub-in polyurethane sealant to give the cabinets a nice gleam. It took 3 coats but the result was very nice – a subtle shine and deep finish.
This is about the simplest sealed finish you can go with. It would be easier to use an all-in-one stain poly or an oil I guess. But I wanted a nice coloring and when I did the stain I wasn’t sure about what finish I wanted to use in the end.

veneered and stained cabinets with PR an woofer on top receiving their dynamat
The lesson I learned in the veneering and finishing is get it right at the beginning – You can’t cover up bad veneering with stain, finish, or lacquer. Same thing with incomplete sanding or poor staining, so get every stage right and take your time. I’m very happy with these for my first effort but they are by no means perfect. But do they look better than the original vinyl? Oh yeah.
For next time I will spend more time carefully sanding the veneers down to uber-smooth and looking for sanding marks – it was only when I applied the stain that I saw I still had some in my wood. I also didn’t sand between applications of stain. This is important because the stain can make the grain of the wood raise, which requires additional light sanding to put down, followed by more stain. As it is my veneers have a little more texture than I would like.
I also learned that it’s best to stain slowly and in a fully-lighted environment. Duh. I finished one side as dusk was coming and missed that some extra stain had seeped over a joint, leaving a dark line on another panel of the speaker. So sad. But hopefully I will be the only one who notices.
After the staining and sealing, I moved on to the hardware improvements.
5. My first stop was Larry’s Rings. These rings, available through the Polk Forum, enable you to effectively ‘clamp’ your drivers and passive radiators to the cabinet, instead of screwing them into the plywood. This allows you to make a much tighter connection with the cabinet without damaging the wood, and gives a better seal. This required drilling new sink holes in the cabinets for the rings to fit into. Not too bad.

Rings, straight from Larry

Applying the rings. First thing was to drill new pilot holes
6. The next step was to fit some acoustic barrier insulation into the back, sides, and bottom of internal cavity of the speaker cabinet. The purpose of this is to eliminate resonance and reflective sound within the speaker cavity, improving the clarity of sound. I didn’t use a ton of this material to coat the entire inside of the cabinet because I didn’t want to cut down the volume of the cavity by too much, which could change the frequency response of the speaker. I also felt that some material on all surfaces would break up the reflectivity enough to keep resonance down.
7. My next job was to dampen the basket of the mid-woofer and the passive radiator. Both of these components are made of stamped steel frames, which are thin and can ring, introducing unwanted sound and resonance. I used a duramat-like material I found on the Parts Express website. I cut pieces out and used the included adhesive backing to fix them on to the metal baskets. I used pieces of varying sizes to make as full of coverage as I could. One tip- don’t go too far down on the woofer and passive radiator, or they won’t fit flush in the holes in the speaker cabinet. I learned that the hard way.
Now on to the crossover. The components here are arguably the most important part of the modification and restoration. There is a ton of material on the web and in the Polk forum on how to modify crossovers. Great debates are fought over the best components, what needs to be done and how. Some people spend hundreds of dollars on individual replacement capacitors. My budget was limited, so I researched to find the consensus on what needed to be replaced and what level of component quality would represent the best mix of quality for the cost. I settled on Dayton Audio 1% capacitors and Mills resistors. I think my total outlay for these components was likely around $50. I looked into replacing the inductors, but the opinions on the utility of this were mixed, as were about how important it was to exactly match the DC resistance of existing inductors. With that in mind and minding my budget, I decided to leave the existing inductors in place.

Polk Monitor 7B crossovers. On left is a finished one, on right is the original. Not too bad.
I also bought new gold heavy-duty 5-way binding posts. I drilled out the old posts and put these new ones in. They’re huge- they almost didn’t fit under the crossover circuit board on the back of the terminal cup. But they look awesome and most importantly easily accept high-gauge bare wire, something that the old posts would not do. One tip – the old binding posts are covered in hot glue to seal them. Use rubbing alcohol to loosen the old glue – it comes right up.

New binding posts. They look sweet and are heavy duty.

New binding posts from the back. They are very easy to use.
Soldering in the new crossover components wasn’t hard at all. One thing that made it even easier was de-soldering the inductor wire from the crossover board, which allowed me unfettered access to the bottom of the circuit board. Definitely do this. After that it was as simple as pulling out the old resistors and caps, and putting in the new ones. Everything fit without any modification or fighting.
After all the new parts were in, I tested the crossovers on my bench by hooking up the speakers and putting on some music. Everything worked, so I sealed everything in place with some hot glue to damp vibrations and set it aside.
8. Now came assembly. The first thing to do is to put all the Larry’s rings into place, followed by the batting behind the tweeter. I bound the batting with line to compress it and make it easier to stuff back in. You want the batting to be compact and stay behind the tweeter and not fall down to the woofer or passive radiator.
9. Then I put some foam insulation tape on the back of the terminal cup and screwed in the terminal and crossover. I ran the speaker wires out through their respective holes and taped them down so they wouldn’t move. Then I put in the tweeter, soldering the wires onto the speaker. Then came the mid-woofer, followed by the passive radiator.
The passive radiators would only go in without the foam insulation backing. I was using an insulation with a thickness of over 1/8″, which wouldn’t allow the radiators to tightly screw into the rings at full compression. So off the insulation came. After assembly and leak testing of the speakers, I found that there is some air leakage. I’ll have to re-assemble with either a Mortite sealant or some real armacell.
Once everything was in I rushed them out for a demo on the stereo. As expected they sound great. There is accurate and pleasant sound well balanced through all frequencies. Imaging is excellent and bass response, even with some air leakage, is very good. The tweeters are still a bit laid back as before but the detail and frequency response is there. I am very satisfied. With a little more time on them, I plan on doing an A/B test with my Boston A200s, which prior to the restoration bested the Monitor 7s in midrange and oomph. We’ll see how they fare now.

Polk UberMonitor 7 in front of its rival the Boston A200

Another view of the Cherry Red Polk
I’m also going to wait a while for a definitive test, as my research has found that a proper burn-in of the capacitors only occurs after approximately 100 hours of use. But I can say that even at this early stage I am very satisfied!

Recapped Pioneer SX-1250 and Yamaha P-520 spinning some vinyl
Lesson: Some hard work and not too much money can give you some serious improvements to the Polk Monitors. And you can have real pride of ownership over some speakers you practically build yourself.
The performance-related modes (crossovers, rings) are not hard to do.
Re-veneering the cabinets is another story. The result was good and gratifying but the work is hard. At least for me it was.
I hope this post helps anyone else considering a similar mod

Thanks for sharing your project and congratulations on the results of your efforts. One question I would ask is which specific veneer you used? I want to finish a pair of DIY speaker stands and love the even, smooth grain of the cherry veneer you used. Thanks again for sharing…
LikeLike
I used a cherry veneer from veneersupplies.com. It was the standard adhesive back veneer, nothing special. Thanks for writing!
LikeLike
Thanks for getting back with your reply. What I liked most of your refinished speakers was the evenness of the grain on the veneer. I would be using this veneer on the columns of speaker stands and I want to match the color and grain of my Aperion 6Bs in their cherry finish. Did you use the paper backed line and which cut – flat or quartered – did you choose? Again, a nice job and thanks for responding.
LikeLike
The veneer was the regular cherry flat-cut veneer, paper backed, with 3M adhesive added.
Good luck with your project!!
LikeLike
Thanks for the details and best wishes on my project. If I post pics somewhere, I’ll let you know.
LikeLike
Hello, The collection you show above is mine. it has actually changed a little since then. Monitor series 2 have been sold. Added a pair of SRS 1.2 TL and Monitor 5 with a few other odds and ends (centers, subs, etc). You did a great job on the rebuild. I find that being able to perform these things is part of my attraction to the vintage Polks.Nice Blog you have. Keep up the good work.
LikeLike
Thanks Steven, and what a great collection!
LikeLike
Sup lol
LikeLike
Nice work Steven!. May I suggest that you get the PL-520 elevated to let the SX-1250 ventilate the heat out?
I like your blog site. It brings back some memories of the old gear.
LikeLike
How difficult would it be to pull off the rear panel of the cabinet during this process? What does the joinery inside the cabinet look like?
LikeLike
I think it wouldn’t be too easy – from what I remember all the joins are covered in glue and there are bracing pieces glued in all the corners. I’m sure with some solvent and patience you could get them apart. Good luck!
LikeLike
Thanks for the response. Also, can you confirm reports that these are actually particle board and not MDF?
LikeLike
Was there much difference in sound quality after you replaced the caps?
LikeLike
Hard to tell. I did so much at once, I can’t say what improvement could be attributed to the caps. They sounded like new speakers for sure
LikeLike
ever thought about making a monitor 7 clone?
LikeLike
Hi – beautiful rebuild and setup. I have an almost identical one at the moment – original monitor 7b’s hooked up to an Onkyo TX-4500 MK II. I’m new to this and did not note which terminals were +/- when I unhooked them. Can you enlighten me? Thanks!
LikeLike